You can configure your session using the login dialog, start WinFTP Pro, and then open Login dialog. This dialog may have some more additional sessions or option for you. Just use the Login option and start the process.
In the login dialog, you can see some automatic On Startup, while the user closed the previous session. You can also turn the session off, using the Uncheck the login dialog on startup, while you are closing the checkbox of the previous/last session. You can also, undo all the changes it is all based on all your preferences.
While working on login, you will see the following options-
- New Site
- Session Settings
- Sites Sessions Management
- Site Folders
- Editing an Existing Site
- Deleting
- Renaming
- Creating Shortcuts
- Advanced Functions
- Opening Site in PuTTY
- Default Session Settings
- Pasting Session URL
- Generating Session URL or Code
- Tools Menu
-
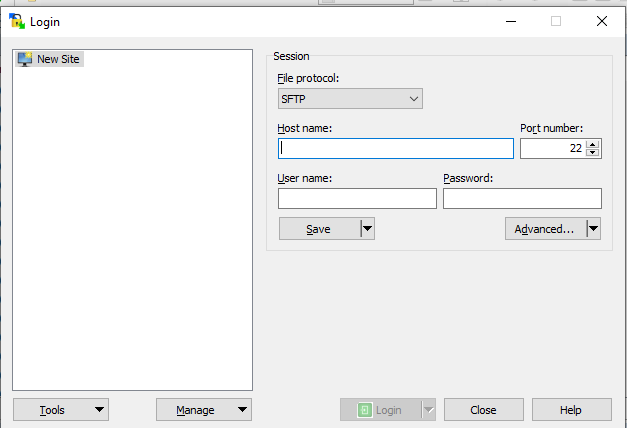
New Site
- You can connect to the new site by using the “New Site” node the left side tree.
- Now, select the Protocol and enter the hostname and username.
- Next, enter the password, and see the below options-
If you want to start an ad-hoc connection, click on the Login button.
- a) Session Settings
- In the File Protocol, you can select the transfer protocol.
- When you have selected the FTP protocol, you can specify whether you use the basic variant, which is unsecured (without encryption), or with the way to invoke FTPS.
- You can type the name/IP address in the hostname box, (Use the syntax %NAME%).
-
Sites Sessions Management
- In this section, you will see the saved sites and workspaces list.
- Open any site by double-clicking a site/workspace
- Select the folder, if you want to open all sites then press the login button.
- You can use the search option if you have many sites.
This option also has some sub-options-
- a) Site Folders – You can organize the site into folders by expanding/collapsing the folder, use double click on its name.
- b) Editing Existing Site – You must use the “Edit” button if you want to edit the site. Save the changes after completion of the editing.
- c) Deleting – Use the command Manage > Delete to delete the selected site, workspace or folder.
- d) Renaming – The command Manage > Rename will rename the site, workspace, or folder.
- e) Creating Shortcuts – You can create the desktop shortcut by using the command Manage > Desktop
- Advanced Functions
- a) Opening Site in PuTTY – Open the session, which is configured or the selected site in PuTTY SSH client other than WinFTP Pro. Use the command Manage > Open under the PuTTY command
- b) Default Session Settings- Use the command Manage > Set Defaults or settings for the selected site.
- c) Pasting Session URL – The command Manage > Paste the session URL (or Ctrl+V) will paste the URL from the clipboard.
- d) Generating Session URL or Code – Manage > Generate Session URL/Code command will let you open the Code/URL dialog for the site, which you have selected.
-
Tools Menu
The Tools Menu is an additional option apart from the configuring session. The WinFTP Pro login dialog box has these options-
- Import the sites from PuTTY or FileZilla
- Configuration of Import/Export
- Cleanup the data, which is stored on your computer by WinFTP Pro
- Run the PuTTYgen or Pageant
- Check the application updates
- Open the Preferences dialog
- Open the About dialog