Using NeoFilm, it is possible to add a text filter directly to the video section. As you have seen, you can control the size of the text caption, font style and color, and its exact position on the screen. However, if you do this, the text title will appear and disappear abruptly because the playhead will exit this particular section.
We all have seen the videos where good titles fade on the screen, so how to achieve that effect? Can this be solved with dissolution-change at both ends of the section? Not really, because dissolving is not just the text title, but also the entire audio-video scene, which can greatly affect what should be a continuous visual experience.
Instead, we should finally move away from the single-track center you have been editing so far and use NeoFilm’s ability to merge multiple video tracks.
Here is how to do it:
- The first thing to do is to use the timeline toolbar’s menu control (far left icon below) to “Create a new video channel.”
- At this point, you can go several ways. Copy one of the defined areas and paste it into the new V2 path directly above its original location (but leave it in its original location). The result will be:
- You can use a text filter in the copy section of the V2 track, and you can apply a blur on the video and blur the video filter.
- Instead of copying the defined area, you can paste your blank transparent PNG image to space above the jet section.
- To do this, make sure the V2 track is selected, make sure the transparent image is selected in the playlist, move your playlist directly over the left-hand cut (which defines the beginning of the section), and press Paste Control.
It happens that the duration of the jet segment we have defined is more than 4 seconds – this is the default duration of the standard image included in a project on the NeoFilm.
Therefore, as you can see here, the image segment is initially slightly shorter than the jet segment below it. You can adjust the image segment by going to the properties of the image and extending it to match the jet section or by pulling the ‘manual’ (which may be easier in this case) until the right edge of the image section matches the cut.
- Now that the image section is still selected, you can open the Filters panel and add a text filter to it, as you did for the intro section.
- Stick with Verdana bold and white – it is enough against this background, and it’s always good if you can be consistent in your fonts.
- Unlike the title, do not use the full screen for the title.
- Scale it and position it accordingly:
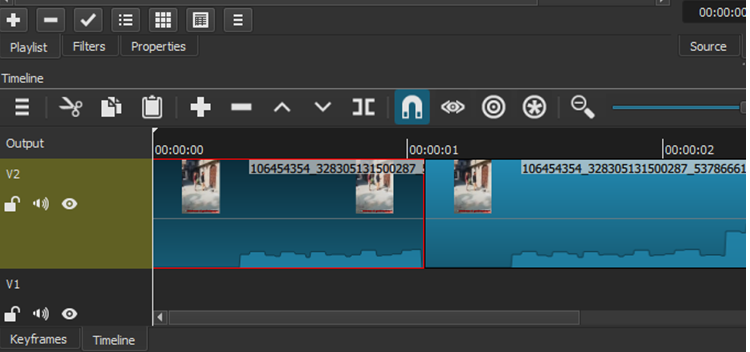
- This screenshot is enough to see both the timeline tracks and the resulting output.
- NeoFilm composes or merges the two video tracks so that we see the opaque characters of the text title on the top track, but right up to the display of the first track below it via the transparent background.
- The title seems to simply float over the moving video, for the time you have selected. The Image section only includes a Fade in video filter and a Fade Out video filter:
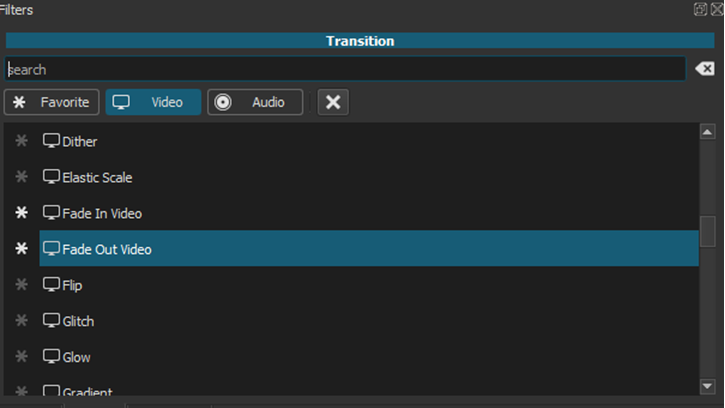
- Both of these filters can be found in the ‘screen’ filter list we saw above (with the text filter – they are very high in the list as they are sorted alphabetically). Again, it should be clear that you are using these blur filters for ‘video’ – or in this case, transparent image segment – but not for text like that.
- Adding fade-in / fade-out capability directly to the text is no doubt on the road map of the NeoFilm team.
- These blurs are, incidentally, visually represented by the oblique shadow areas that you can see in the image section in the upper path.
- If you move the cursor / played to the center of one of these inclined areas, you see in the viewer that the title of your disclaimer text fades to 50% opacity.
- In the meantime, there is nothing else about video or audio transitions: your text title simply fades and hangs there for over 4 seconds and then fades.
You can repeat this method to add as many text captions as needed to a given video track – in fact, even if the first one is enabled, it’s easy to copy this top image, move the playlist to a new location on the V1 track, and paste its top copy into the V2.