Computers with webcams and screen-capture software and mobile phones with video capabilities now make it possible for a wider group of people to capture raw video footage of some events, computer software demonstrations, a concert, a trip to Iceland, or Anything else that is worth preserving and showing in the video. This 5 minutes guide will make you understand this explosion of videography in the current digital age.
Open/Import Files
In the NeoFilm, you can open a file by using the Open File button in the control bar or by selecting “File”> “Open File.” via the drop-down menu at the top, which will activate your default file browser window and allow you to navigate and select a file:
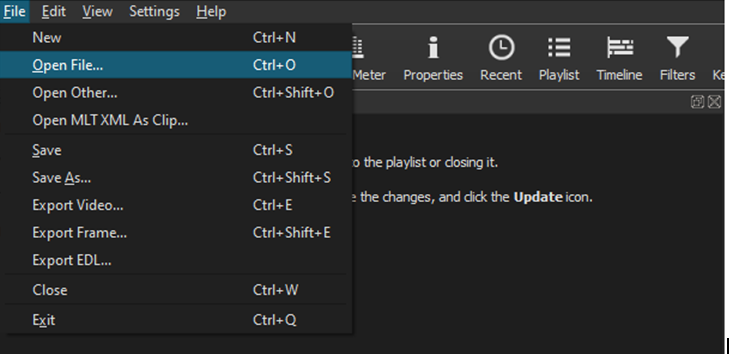
Here, the file browser by default takes you to the location where the edited videos are stored. However, you can choose another location or folder from where you want to import the files.
At the bottom of the source window, you can see some common video controls that can be used to rewind (or pause) the audio and video, fast forward, magnify the view by 25% to 200%, or show volume control (if there is audio, by default, whatever the full volume of the audio is) Will be set
The blank playlist panel shows several useful methods – but interestingly, it does not figure out how to add an item first.
You can do this by clicking the white + button on the bottom left of the panel. This will add to the playlist what is currently shown in the source, which will now be displayed as follows:
- “xyz.mov” clip is now displayed as an item in the playlist (only item here).
- NeoFilm now considers this as an asset in the project (a project still called “unnamed *”, it is not saved as a project file.
When the clip is showing in the playlist, you can immediately start changing it from there in many ways. For example-
- After clicking on the playlist item to select it (it will turn blue, as shown at that time), to display the Properties panel,
- Next, click on the Properties button at the top of the toolbar and load it with its properties.
Now, for example, you can change some of the properties of the video clip like below-
- Including the speed of the video
- The duration of the clip and even the aspect
- Lastly, with this clip now in the playlist, you can open the Filters panel and start using multiple filters per clip.
Usually, the timeline panel opens automatically when you first open an audio or video file, just like when you opened the first video above. Otherwise, you can open it via the timeline button on the top toolbar.
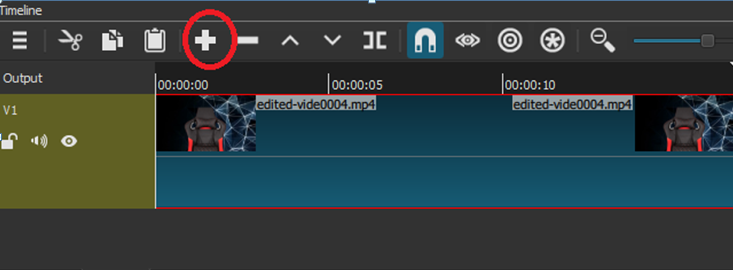
Use of + Button
- The + button will add any selected item in the playlist to the NeoFilm timeline.
- In case there is already a video file in the timeline, if it is selected, a new video file will be added to that path.
- If there is no track yet, this control will automatically create one and add the video clip to point 0.
Here is what happens when we add the first clip of the project:
- You can see the video track called “V1” created by NeoFilm, in which the video clip starts at point “0” inserted.
- The audio of this video will also be included in the same track.
- We can see this as a wave shape at the bottom of the path.
- NeoFilm now considers this to be a “master” track, although you can add many additional video or audio tracks to the project.
Use of the Arrow Keys
- Using the left and right arrow keys on the keyboard, you can move back and forth through a section of the path, at short intervals.
- When you do this, you will also hear the corresponding audio for these precise locations, unless you choose to disable.
- It may be slow or lagging the audio, which may be a shocking experience at first, but it’s really a key feature of excellent audio-visual editing.
NeoFilm application is easy to use for you to make necessary changes in video and audio files at your fingertips.