In this guide, we are going to experiment with different editing methods with one video. These two methods are considered to be different at some stage while editing the video using NeoFilm video editing software. The screenshots of the same as shown simultaneously in the same project under the view option.
We can see the possibilities when you fit of keeping the track as V1 and V2 here on the playlist panel side by side. The V1 here will be for the visual markers of the activity from where the shot begins. In addition, you can see e the endnotes and the transitions, which can be e significantly useful while adding some more effects in the audio file for the presentation purpose.
We need to ensure some things that the additives we are applying to the audio and effects, which is the addition to their V2 track, not on the V1. In addition, you need to be very careful at the entire edits you have made in V1 are currently e writable or editable and also changeable. Whether you are doing it by intention or not, as long as the track has remained open in your project and you have not locked it.
At the same time, you may need to keep the V1 track unlocked because you want to edit and make some adjustments to the original track editing, such as expand or contract, move or Delete some segments and transitions, modify, delete, or filter with etc. However, if you have made such changes, then the V2 track will not be e displayed as the current file land here. You need to delete it or reopen it in any way.
Keep the V1 track open
All over things are considered if you keep the V1 track open and also keep it unlocked simultaneously with the V2 track seems to be an unsuccessful effort. Generally, some of the useless efforts that away if you have kept the V1 track locked. However, if you are simply displaying it, which means the software NeoFilm, is consuming some more memory.
The entire edits then why you are still remaining and able to be loaded in a separate form into the memory wherein the way to track they are a part of a single file which is encoded. Also, the given UI is generally Abbott cluttered, and there is not much space to add anything. For example- more than one audio track, as you would like to add below.
Delete the V1 track
Considering all the above points, you can now simply delete the V1 track bi using the right-click in the control portion of the display track.
- Select option removes track, and here you can also remove the original one. Now you can move the video clips from the about playlist and leave it a bit less cluttered as well.
- At this stage, NeoFilm video editing software will rename the V2 track to V1 automatically because this track is only the remaining video file in the current project.
- The effect made by you is the same whether you have started it simply as the new project and then opened one MP4 file into the project.
- Go ahead and save your project in the new state; you can give this a new name.
Your old V1 project, which was segmented, is still available for you, and it will remain as a separate new film project file. Therefore, if you need the file again in future, you can revisit it and make the possible changes whatever you want. Now your file is completely ready to have a look and to do some possible background music adding into the video.
If you are a professional musician and you have some good digital equipment, here you will find out the audio rather than you creating it. In addition, these days these kinds of files are easily available which you may find easily online. For more results, you can do Google research and find some background music, which is free.
For example– you can specify the terms while searching on Google based on the particular mood as well as some other videos, which has some instrumental music ok and kind of dreamy and soft music.
Selecting different video tracks
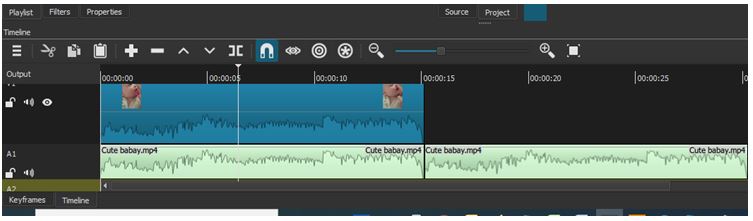
Now take different videos, which are longer to 30 seconds to 1 minute, and start editing the same by adding the background music. Now see the various segments measures and the bar of each track and music. Make sure the music is in each piece map want to the video file.
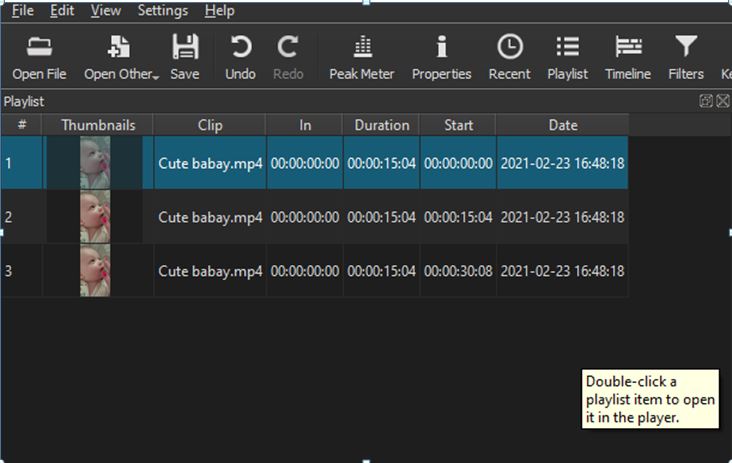
Now address to the playlist, and also from there, you can at the same track to the timeline. Now the playlist has been successfully added along with the MP4 video. Here you can also select the first audio track. After selecting, it will be highlighted in a blue colour like the below-mentioned screenshot-
- Now, you can simply click on the append (+) control button in the available timeline. Mixing or the timeline don’t have other files except for the one video file or track.
- By default, the NeoFilm software will append the V1 audio track’s segment at the end of the video, which is what you want to do.
- Instead of it here, you will have to use the drop-down option available on the timeline menu control, where you can use the option “add audio track” and then choose the new A1 track.
If you want to add the other audio tracks in the same timeline for the purpose of comparison between all the tracks, then you can create two additional audio tracks, and you can add and rename them as Audio2 and Audio3.
In both these steps, first, you need to ensure that the correct video track or clip has been selected in the playlist. Therefore, you do not need to append the audio track to the end of another audio track. Once you have added all three audio tracks, the timeline will look like the following screenshot.